
AWS VPN offers a robust solution for establishing secure connections between your resources. You can use it to connect on-premises data centers, remote offices, and other cloud environments.
In this article, we shall explain the step-by-step guide on how to use AWS VPN and configure it for creating secure private connections. So, without further delay, let’s dive right in.

Steps to Setting up AWS VPN
Below are the steps to set up AWS VPN correctly. Follow them thoroughly for an accurate configuration.
Step 1: Generate Server and Client Certificates and Keys
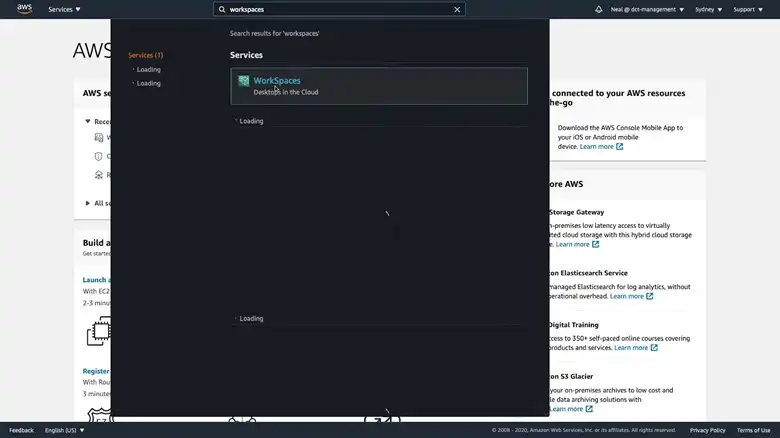
1. Open your AWS Management Console and type Workspaces in the search panel. Once the results appear, click WorkSpaces.
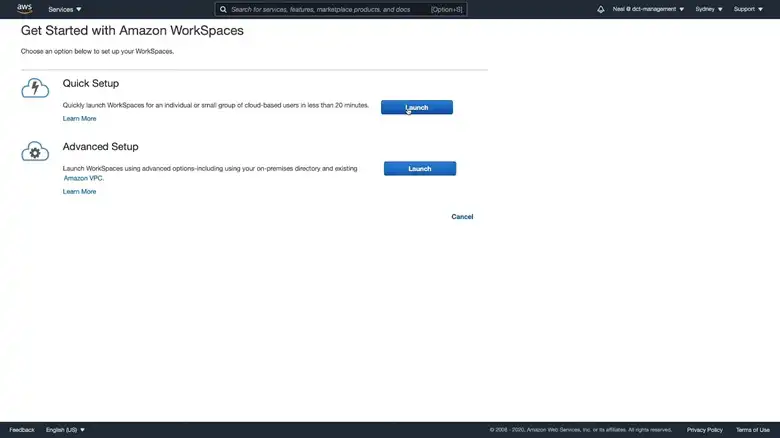
2. Click on Get Started Now and launch the Quick Setup.
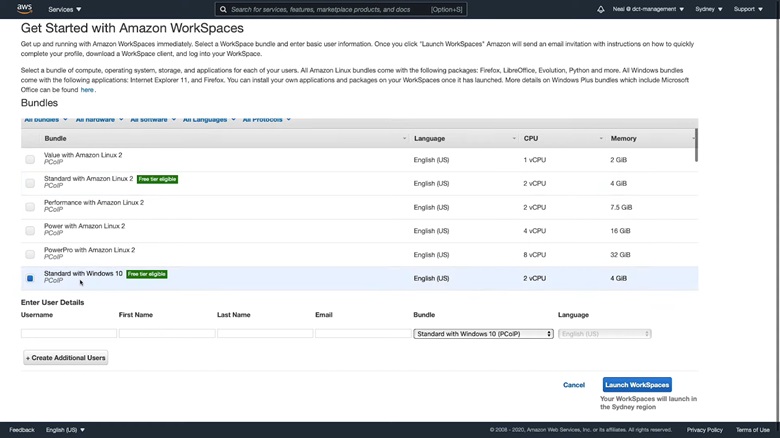
3. Select the standard Windows bundle which is Free tier eligible and enter the user details like username, email, etc. Then, click on Launch WorkSpaces.
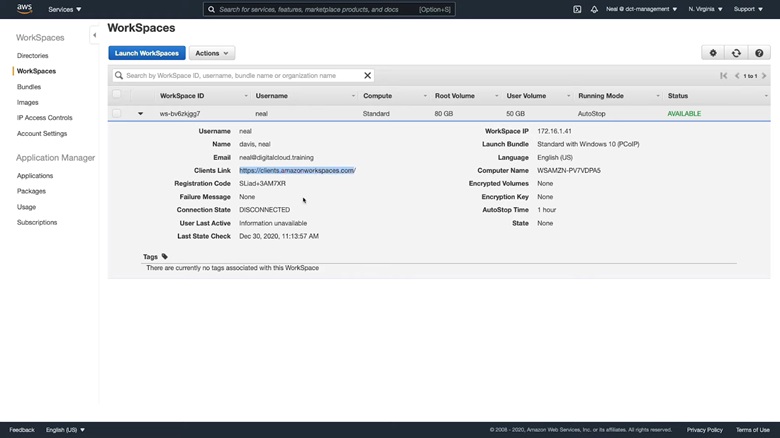
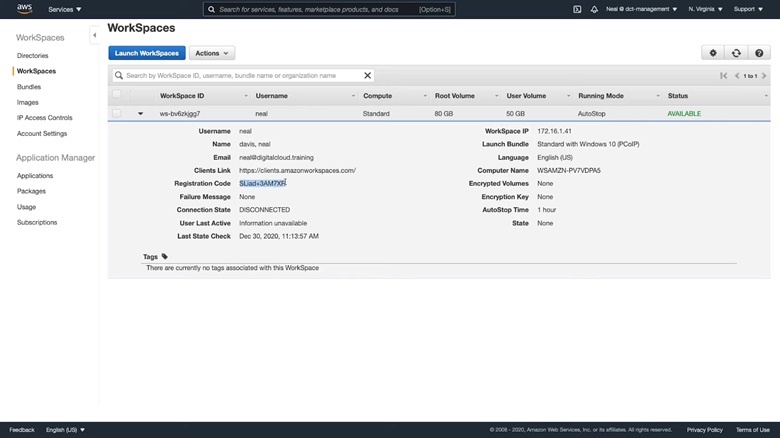
4. Once the workspace is available, copy the Clients Link.
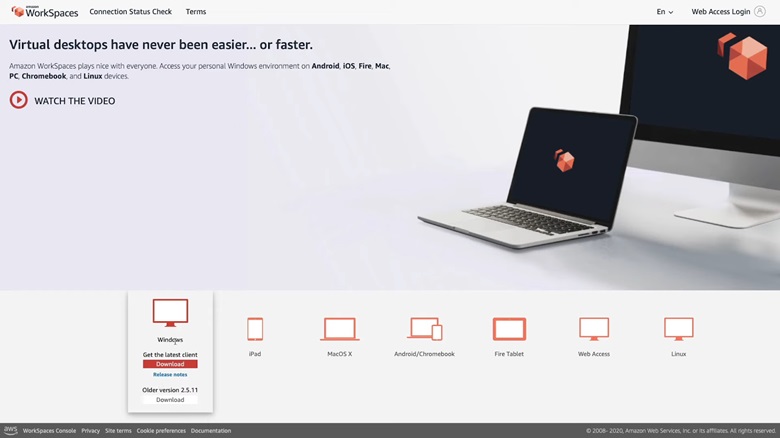
Paste the link in a new browser window. Doing so will redirect you to a page for downloading the client software. Download and install the latest client for your OS.
5. Go back to the WorkSpaces page and copy the Registration Code.
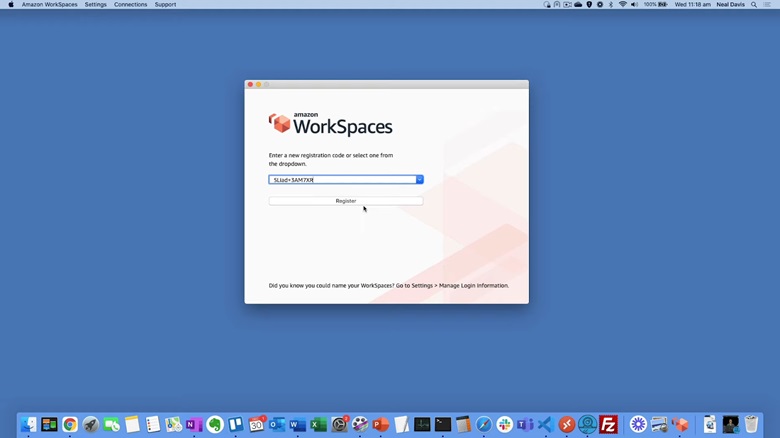
6. Launch the client software you just downloaded and click on Change Registration Code. Paste the code you copied and select Register.
7. Check your email inbox for the link to reset your password for the WorkSpaces account. Next, use your credentials to sign in and start your WorkSpace.
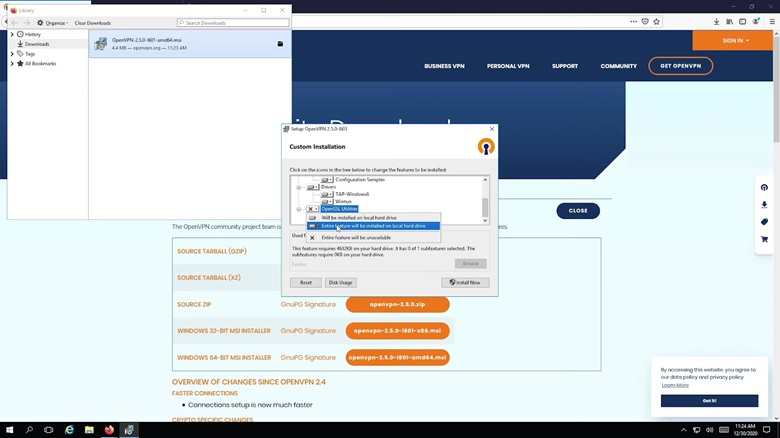
8. If you haven’t installed OpenVPN already, download it from the official website. While installing, click on Customize, change the directory that does not contain the system drive, and click OK.

Scroll down to the bottom, expand the OpenSSL Utilities, and choose to install the entire feature on the local hard drive. This will install the EasyRSA package.
9. Open Command Prompt, navigate to the location where the EasyRSA-3.x folder was extracted, and run the following commands one by one.
To open the EasyRSA shell:
.\EasyRSA-Start.bat
To initialize a new PKI environment:
./easyrsa init-pki
To build a new certificate authority:
./easyrsa build-ca nopass
To generate the server certificate and key:
./easyrsa build-server-full server nopass
To generate the client certificate and key:
./easyrsa build-client-full client1.domain.tld nopass
Step 2: Create a Client VPN Endpoint
1. Go back to the AWS Management Console and type Certificate in the search bar. When the results appear, click on Certificate Manager.
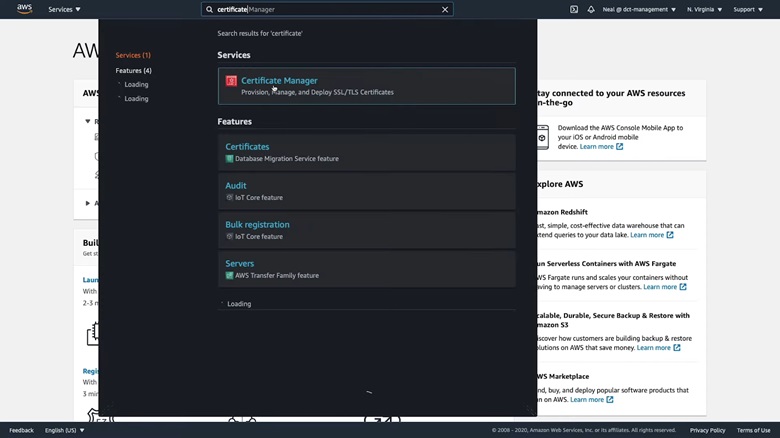
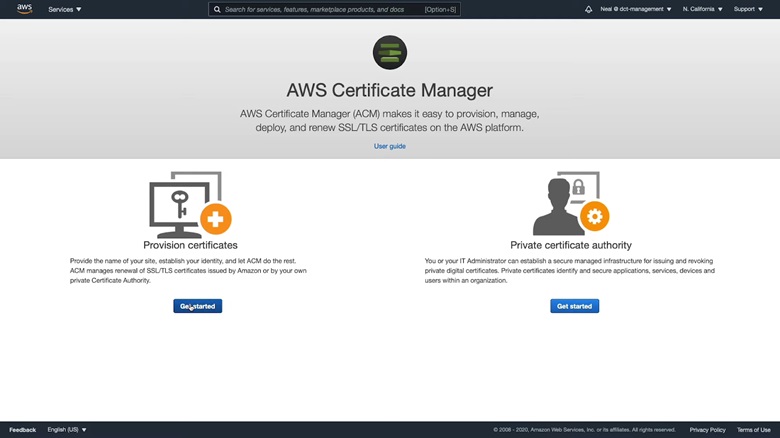
2. Change the region to where you want your VPN endpoint to be. Next, click on Get Started under Provision Certificates and choose Import a certificate from the top of the page.
3. Open File Explorer and navigate to the “pki” folder inside the easy-rsa directory. Go to the folder called “issued” and open the “server” file using Notepad. Copy the entire text and paste it into the Certificate body textbox.
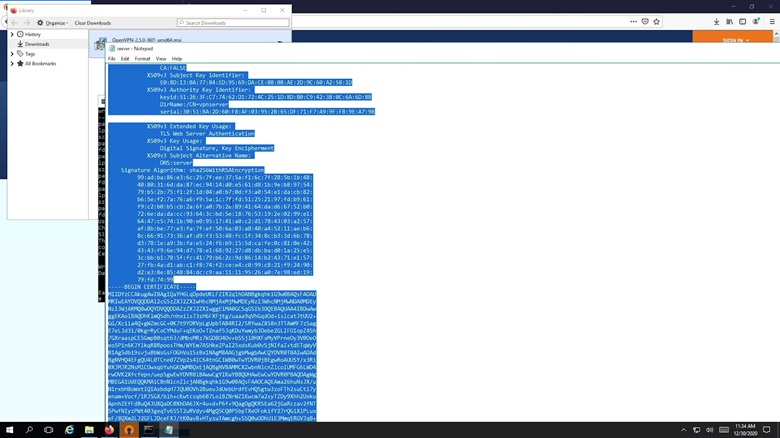
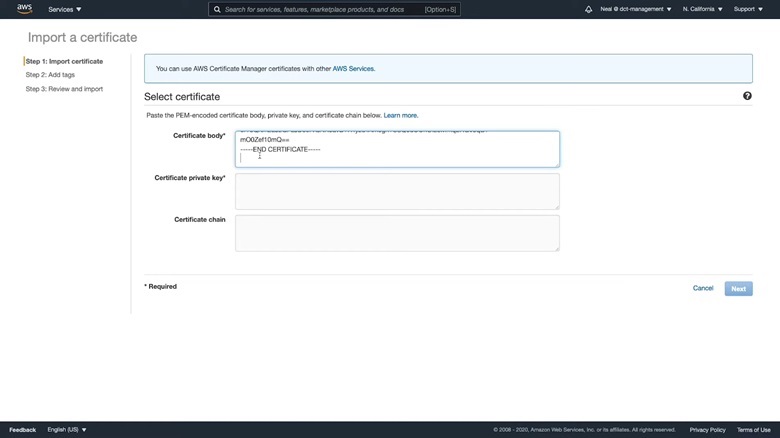
4. Now, go back to the “pki” folder and navigate to “private”. Open the “server.key” file using Notepad. Copy the key and paste it into the Certificate private key textbox.
Also, copy and paste the Certificate chain. You’ll find it inside the “pki” folder with the name “ca”. Finally, click on Next > Review and Import> Import.
Do the same for the Client certificate and import it as well.
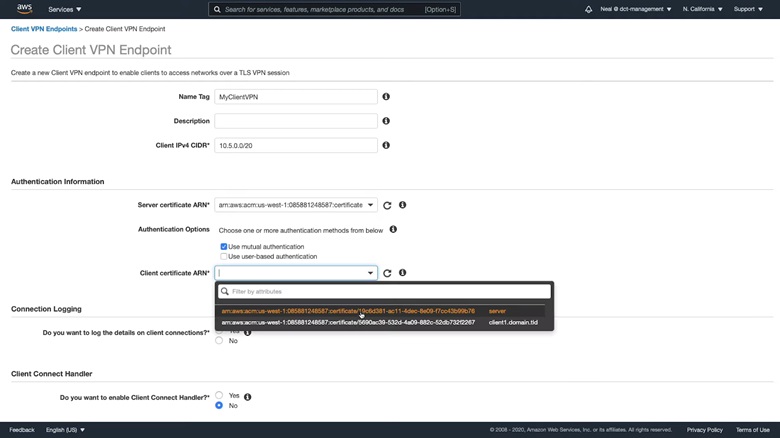
5. From the Amazon VPC console, scroll down the left navigation pane and select Client VPN Endpoints. Choose Create Client VPN Endpoint and fill in the details.
Step 3: Associate a Target Network
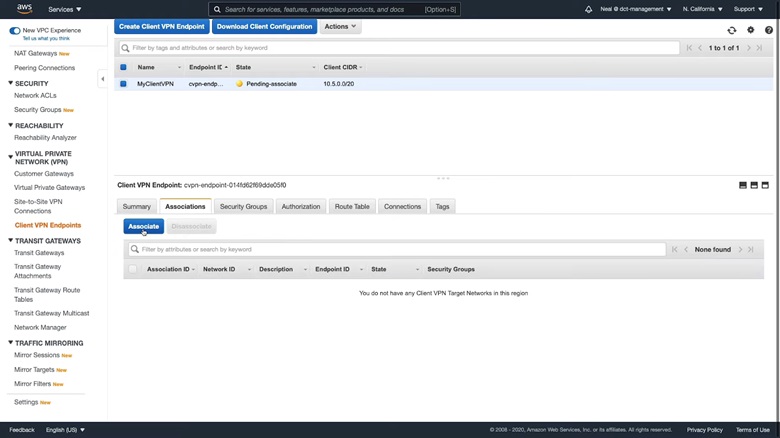
After creating the client VPN endpoints, you’ll see that its status is “Pending-associate”. So, go to the Associations tab and click on Associate.
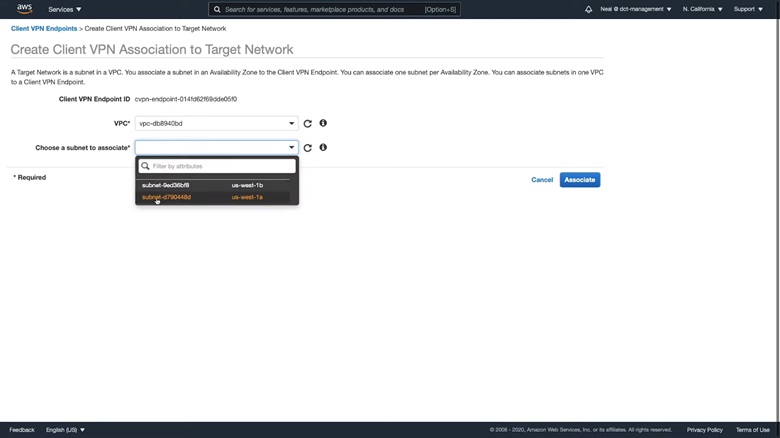
Choose a VPC and a subnet to associate. Click Associate.
Step 4: Add an Authorization Rule for the VPC
Go to the Authorization tab and choose Authorize Ingress.
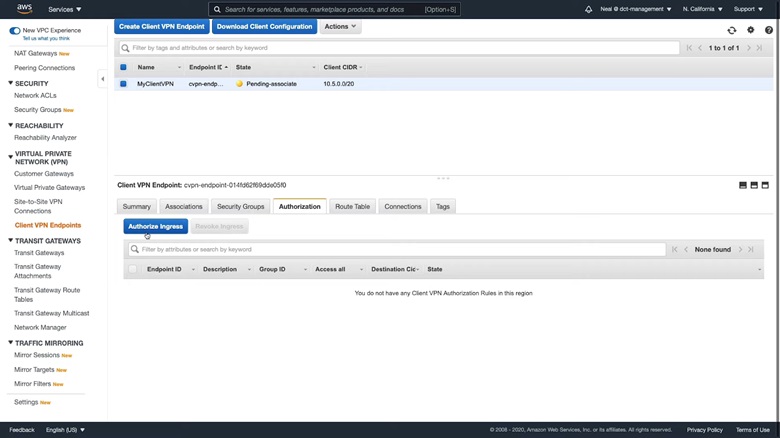
Set 0.0.0.0/0 as the Destination network to enable. Choose Allow access to all users and click Add authorization rule. It might take a few minutes for the association to complete.

Step 5: Connect to the Client VPN Endpoint
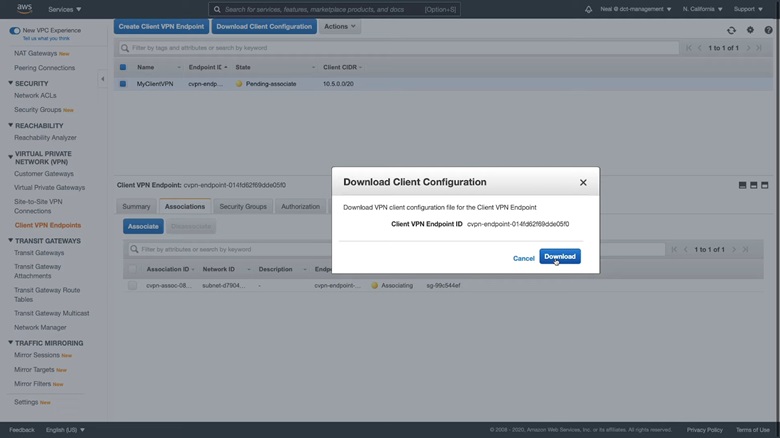
1. Click on Download Client Configuration > Download.
2. Locate the client certificate and key that you previously generated. Open the Client VPN endpoint configuration file in Notepad and edit it as follows.
<cert>
Contents of client certificate (.crt) file
</cert>
<key>
Contents of private key (.key) file
</key>
3. Find the line containing the Client VPN endpoint DNS name, and add a string before it. Here’s an example.
Before adding the string: cvpn-endpoint-0102bc4c2eEXAMPLE.prod.clientvpn.us-west-2.amazonaws.com
After adding the string: asdfa.cvpn-endpoint-0102bc4c2eEXAMPLE.prod.clientvpn.us-west-2.amazonaws.com
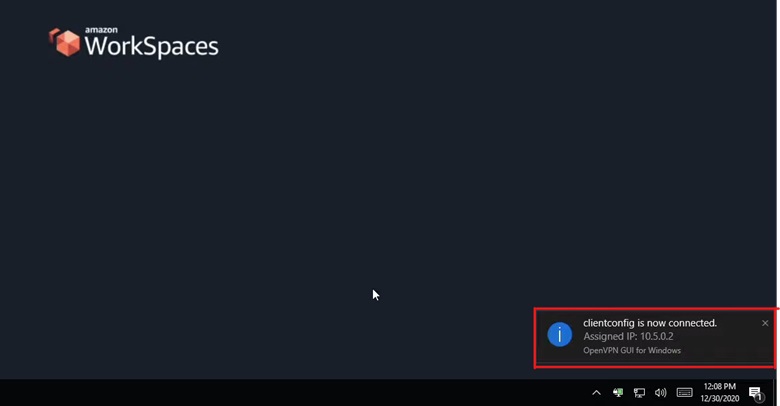
4. Save and close the file. Lastly, distribute the Client VPN endpoint configuration to the end users. You should now be able to connect to the Client VPN endpoint using your client application.
Frequently Asked Questions
Is VPN free in AWS?
Amazon will charge you for each site-to-site VPN connection you create based on the number of hours it stays provisioned and available.
Which type of VPN is used by AWS?
AWS Client VPN uses a TLS protocol for VPN tunneling.
Are VPC and VPN the same?
VPC and VPN serve distinct roles within AWS. VPC functions as AWS’s virtual network environment, enabling the creation of isolated network segments for your cloud resources. In contrast, a VPN is a technology that lets you establish secure connections between networks or devices.
Conclusion
The detailed process on how to use AWS VPN is described above, and we hope you can now set up secure connections using it. However, if you know any workarounds to achieve the same, feel free to share them with the community. Thanks for reading!
![Read more about the article Can a Proxy Be a Virus? [Facts Behind That]](https://vpnaware.com/wp-content/uploads/2023/10/Can-a-Proxy-Be-a-Virus-300x168.webp)
![Read more about the article [2 Fixes] AnyConnect Is Not Enabled on The VPN Server | A Solving Guideline for You](https://vpnaware.com/wp-content/uploads/2023/03/AnyConnect-Is-Not-Enabled-on-The-VPN-Server-300x168.webp)